MacbookPro M1 with Asahi Linux: Fractional Display Scaling in GNOME
The MacbookPro has a high pixels-per-inch screen, or as Apple likes to call it, a Liquid Retina XDR display. Including the notch area, it measures in at 3456x2234 pixels at 254 PPI. It’s a beautiful screen…
…until you run Asahi Linux and learn that you either get 100% or 200% scaling for your display.
What is scaling, anyway?
When using the 3456x2234 screent at a 100% scale - or no scaling. This means that things will be come incredibly small and hard to read. Normally, Apple runs at a scale of 200%, doubling the size of everything on screen. This scaling ensures that visual elements maintain clarity and are more appropriately sized for people on high-resolution screens.
In GNOME the options are 100% and 200% and nothing in between.
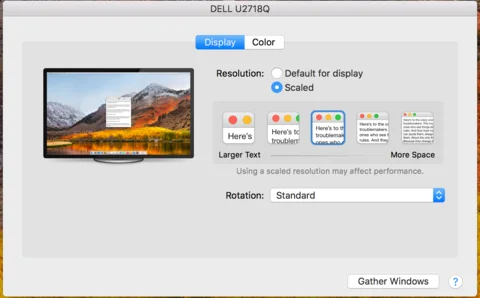
On Apple devices, you get a few choices ranging from Large Text to More Space.
Wouldn’t it be nice if we had the same options in GNOME?
Enabling fractional scaling in GNOME
Fractional scaling is not an officially supported feature in GNOME yet. Luckily, it’s available as an experimental feature. You just need to enable it:
gsettings set org.gnome.mutter experimental-features "['scale-monitor-framebuffer']"
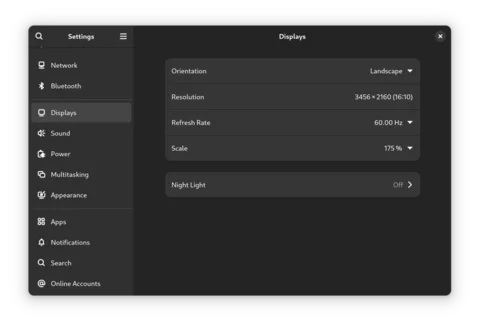
When you now go into GNOME Settings -> Displays you’ll see that the 100% and 200% buttons have been replaced with a dropdown, offering you 100% up to 400% in steps of 25%. I’m currently running at 175%, just like on macos, as I find it a good balance between readability and screen real estate.
Fix for Chromium
Now, all apps I’ve used so far work brilliantly with the fractional scaling at 175%. The one exception was Chromium. It looked blurry and annoyed me enormously.
Chrome by default will not use Wayland as it’s platform backend so scaling will be
a bit iffy. Go to chrome://flags and search for Ozone and select
either Wayland or Auto so the correct backend is used. Restart Chromium and you’re
done.
Saving for automation
Because I’m a lazy programmer I spend a disproportionate amount of time automating things that probably don’t need automating. Having an automated setup with Ansible that configures and sets up a new machine for me is very helpful indeed.
I’ll share more on this later, maybe, but my Ansible setup will configure anything from my user account, hostname and installed packages to configuring GPG, cloning dotfiles and tweaking GNOME settings.
Basically, when my Ansible playbook has finished, I have a working setup, across machines, to start working. My Fedora Asahi Linux machine is no different, since it need just a few changes from my Arch setup (mainly, a different package manager).
Anyway. Where you’d normally be able to use dconf to save settings for GNOME, that
was not possible with Displays. Of course, the dislay settings are more fundamental
than GNOME itself.
Luckily, I found out that a file named ~/.config/monitors.xml was generated. You
can clearly see the scale entry here. (I guess using that arcane floating point number
instead of 1.75 gives better results.)
So, this file was not quickly put into my Ansible playbook and will now be automtically restored with my setup.
<!-- ~/.config/monitors.xml -->

<monitors version="2">
  <configuration>
    <logicalmonitor>
      <x>0</x>
      <y>0</y>
      <scale>1.7489879131317139</scale>
      <primary>yes</primary>
      <monitor>
        <monitorspec>
          <connector>eDP-1</connector>
          <vendor>unknown</vendor>
          <product>unknown</product>
          <serial>unknown</serial>
        </monitorspec>
        <mode>
          <width>3456</width>
          <height>2160</height>
          <rate>60.000</rate>
        </mode>
      </monitor>
    </logicalmonitor>
  </configuration>
</monitors>


